Next Steps

This section is for teams using PagerDuty to help with everything from setting up your profile to where you can find advanced resources on topics ranging from incident response to postmortems.
On-Call in PagerDuty#
Successful on-call starts with setting up your profile correctly, including contact methods and staggered notifications. Once the profile has been set up, schedules and escalation policies are the next step.
Setting Up Your Profile in PD#
To set up your profile in PagerDuty, start at the My Profile section under your user icon. You will find the Contact Information tab, where you can input your contact information. You also have the ability to test your notification methods in the setup section. Click here for in-depth step-by-step How Tos on profile configuration.
Tip
Contact information should include SMS, push, phone, and email
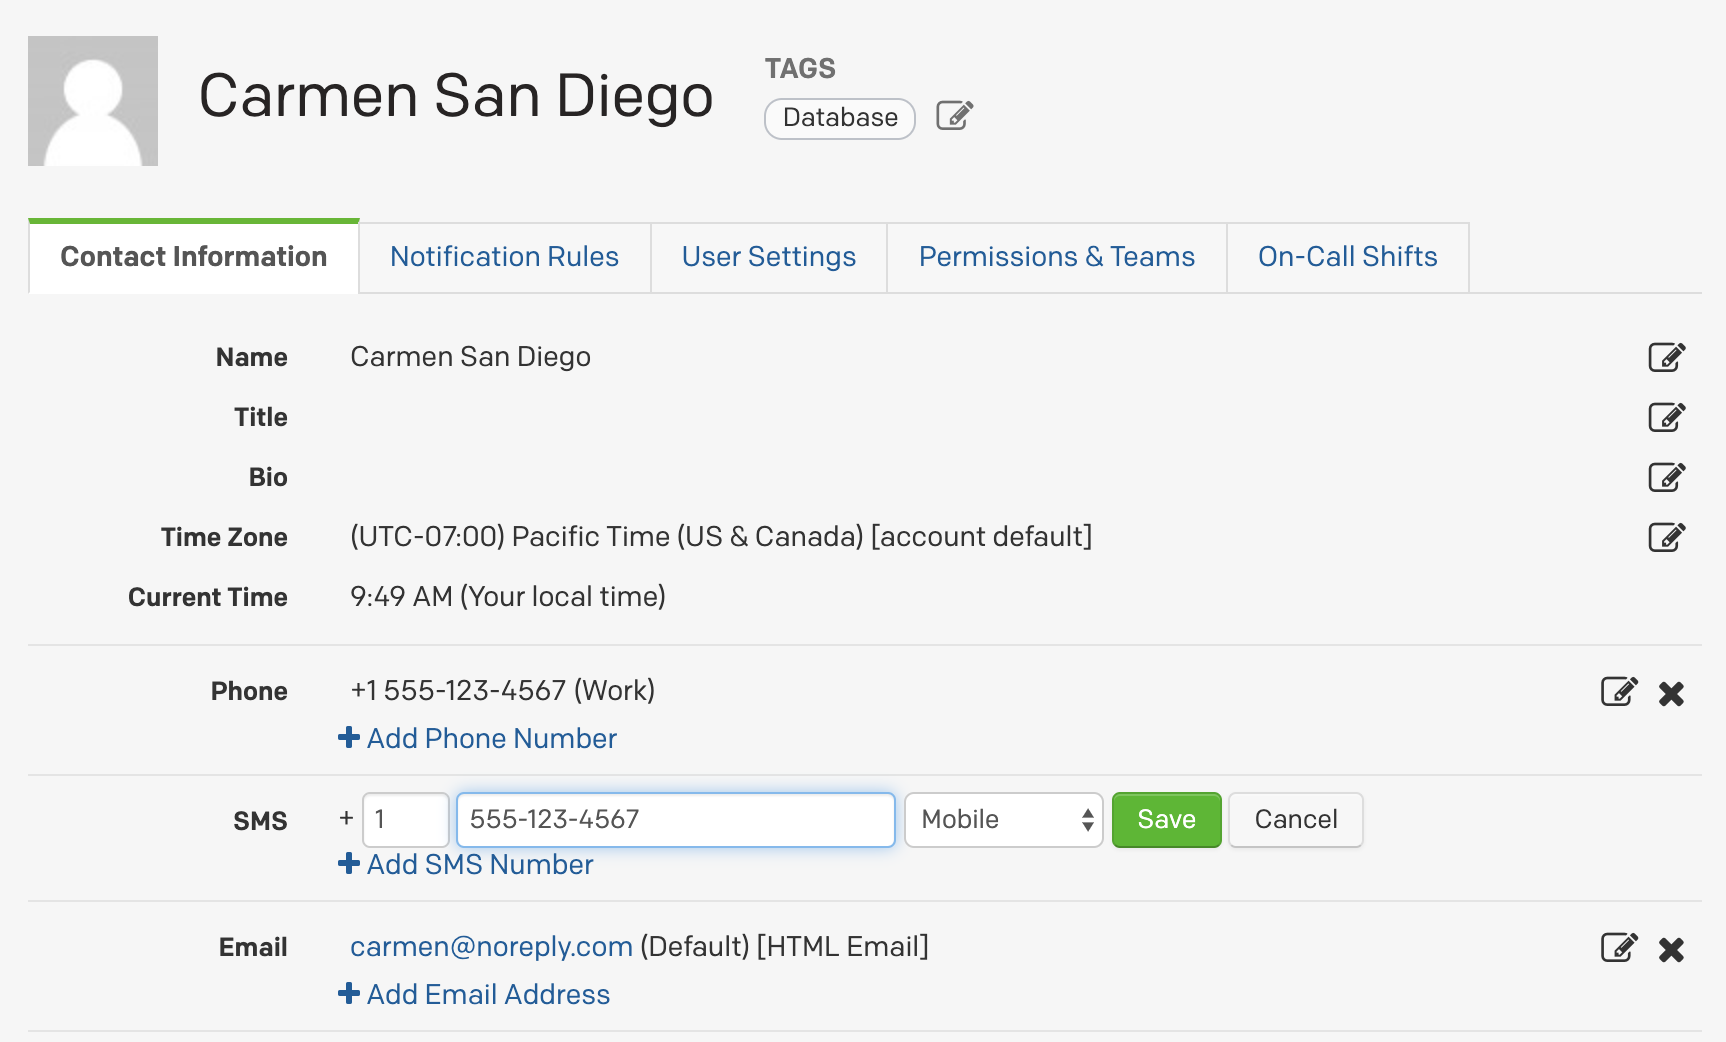
A best practice is to also download the PagerDuty vCard to add all phone and SMS notification numbers to your contacts. This will also enable you to bypass “Do Not Disturb” mode so that you never miss a page. For more information on how to download and automatically update the PagerDuty vCard, check out this Knowledge Base information.
Tip
Don't forget to download the PagerDuty vCard
Setting Up Notifications#
Proper notification rules will protect you from missing high urgency alerts and also help avoid getting woken up in the middle of the night for a low urgency alert.
Tip
Set up staggered notifications so you don’t get them all at once
To set up notifications, select the Add Notification Rule in your profile. This is where you can decide how you want to be notified for both high and low urgency alerts. You will choose the number of minutes between when the incident is assigned to you and when you receive the notification.


Schedules and Escalation Policies#
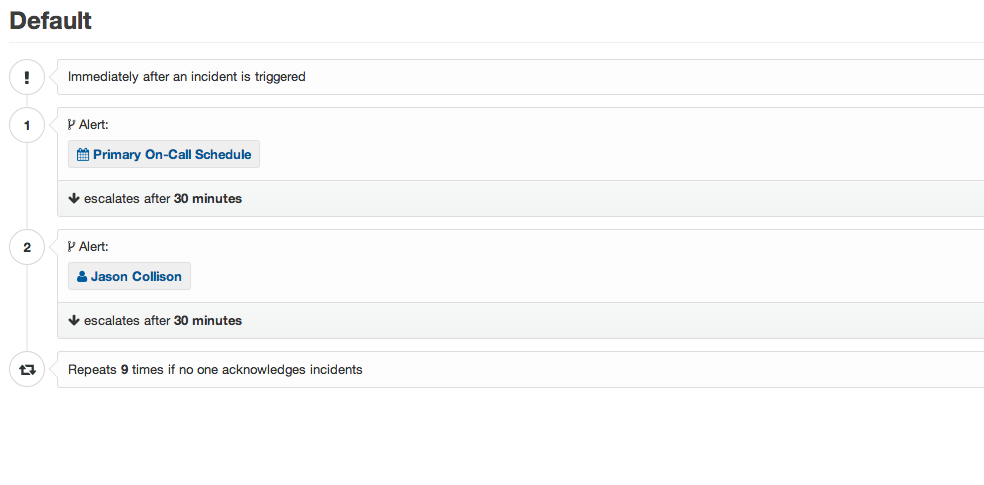
Escalation policies allow you to mobilize the right people at the right time by connecting services to on-call schedules. A best practice with any escalation policy is to have a multi-tiered approach; at PagerDuty, we have three tiers of escalation policies for services.
Tip
Individuals should never be assigned to an escalation policy; instead, a schedule should be assigned. For example, if your CEO is the final escalation point, put the CEO on an on-call schedule titled “CEO On-Call” and have that schedule be the final escalation path.
Once the escalation policies are created, then services should be attached to those policies. A sample policy is below.
On-Call Readiness Reports in PagerDuty#
On-Call Readiness Reports help you and your team manage notification rule configurations. Use the reports to ensure every member of your team has their contact information and notifications set appropriately in PagerDuty.
These features are available in the Business and Digital Operations plans.
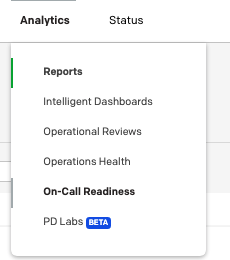
To create a report for your team, mouse over the Analytics header in PagerDuty, and then select On-Call Readiness from the menu.
To build a new report, simply choose one of the options. The most basic is “Must include phone,” while “Never miss a page” will look for multiple contact methods as well as notification timing.
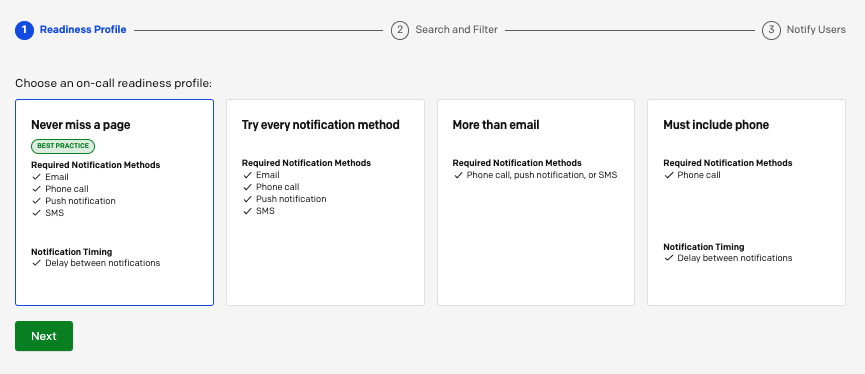
Select the level of notifications you want to report on for your team, and click Next.
If you have multiple teams, select the team you’d like to report on in the summary screen. You’ll also see a preview in the “Readiness Details” panel. If any of your team members don’t meet the criteria, click Next.
PagerDuty will send an email to all team members who haven’t configured their accounts to meet all of the requirements at the selected level. You can customize the settings for the email and include customized documentation if you’d like.
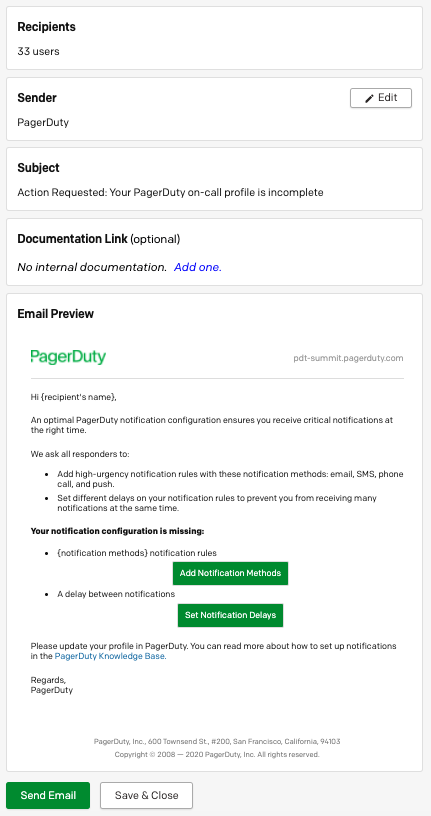
When you click “Send Email,” anyone on your team with an incomplete configuration will be notified.
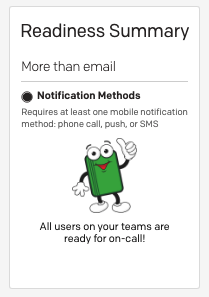
If your team is fully configured, you won’t have the option to send email. Pagey will let you know that you are good to go!
For more about the On-Call Readiness Reports, including descriptions of the available reporting levels, see this Knowledge Base article.
